

How I ridiculously Message the "random generated password" to the User's Mobile Number using python?


Table of contents
- First Python file (passwords.py)
- What is a random module?
- What is an array module?
- Define the Python Variables for alphabets, numbers and symbol
- Combine the characters to form the array of passwords
- Randomly Choose each character from each Python variable
- Combine the random elements of the Python Variables.
- Fill the rest of the password Characters using Python for loop
- Combine all the 4 and randomly choose characters to Create a Strong Password
- Send the generated password to the user in Python
- Conclusion
Did you know you can Message the generated password to the User's Mobile Number?
Yes, this is possible. In many Python projects, you've seen the random generated password. But I'm sure you've never Message the generated password to the user's mobile number. Today you can add, this new functionality to your python project.
As a Computer Science Student, you know the value of the new functionality.
Here, I'm going to add the functionality to the old project.
In this python project, you're going to see the two files that I'm going to Create.
The First file shows the code for the random password generator.
And Second file shows the code for sending the message to the user.
We're going to combine both files.
Take a pause!
Do you watch Shark Tank?
Many people are pitching their businesses.
Ok, leave the Shark Tank and come to the Python Project.
So, we've created the three files.
Let's go to the first file that is passwords.py
The passwords.py file generates the random password.
You can use the random password generator to make a strong password.
As you know, college students are suffering to make a strong password.
The random password generator can help you.
It's time to do code!
First Python file (passwords.py)
First, we'll import the random and array module.
Here's how:
import random
import array
Let's understand what these modules are!
What is a random module?
A random module randomly chooses the element from the sequence(list).
For example, you can choose the number from the list using random module.
The random has a list of methods that you can use.
Here's the code:
import random
list = [1,3,5,4,2]
b = random.choice(list)
print(b)
Output:
4
So, this is the one method of the random module.
You can check detailed info about the random module in this post.
What is an array module?
An array module handles the array related methods. It's like the list data type.
The difference is that it stores similar data types.
Here's how:
# importing "array" for array creations
import array as arr

# creating an array with integer type
a = arr.array('i', [1, 2, 3])

# printing original array
print ("The new created array is : ")
for i in a:
    print(i)
Output:
The new created array is :
1
2
3
Likewise, you can create other types of arrays.
Other types of array you can check here.
So, we've covered the random and array module.
Next, we’ve to define the length of the password. The password length can define using the input() Method. Because length is the integer data type, I’ll convert the input to an integer using the int() method.
See the code below
import random
import array

# maximum length of password needed
# this can be changed to suit your password length
MAX_LEN = int(input('Enter the number of digits: '))
We've used int() method because input() takes value as string data-type.
Define the Python Variables for alphabets, numbers and symbol
As you know, to generate a random password you need numbers, alphabets and symbols. We can define this using variables For example,
DIGITS = ['0', '1', '2', '3', '4', '5', '6', '7', '8', '9']
LOCASE_CHARACTERS = ['a', 'b', 'c', 'd', 'e', 'f', 'g', 'h',
                    'i', 'j', 'k', 'l', 'm', 'n', 'o', 'p', 'q',
                    'r', 's', 't', 'u', 'v', 'w', 'x', 'y',
                    'z']

UPCASE_CHARACTERS = ['A', 'B', 'C', 'D', 'E', 'F', 'G', 'H',
                    'I', 'J', 'K','L', 'M', 'N', 'O', 'p', 'Q',
                    'R', 'S', 'T', 'U', 'V', 'W', 'X', 'Y',
                    'Z']

SYMBOLS = ['@', '#', '$', '%', '=', ':', '?', '.', '/', '|', '~', '>',
        '*', '(', ')', '<']
Here, you can see that I've defined four variables. Because we need a combination of characters in our password. It gives us a strong password.
Combine the characters to form the array of passwords
A Strong password needs a Combination of all the variables that I’ve defined. You can combine all the variables using concatenation. Here’s how:
# combines all the character arrays above to form one array
COMBINED_LIST = DIGITS + UPCASE_CHARACTERS +LOCASE_CHARACTERS + SYMBOLS
In the above, you can see that Variable COMBINED_LIST stores all the Characters.
Randomly Choose each character from each Python variable
After Creating the Combined list. we need to choose a random character from each variable. You can see the code below:
# randomly select at least one character from each character set above
rand_digit = random.choice(DIGITS)
rand_upper = random.choice(UPCASE_CHARACTERS)
rand_lower = random.choice(LOCASE_CHARACTERS)
rand_symbol = random.choice(SYMBOLS)
In the above code, I've used random.choice() method to randomly choose the element.
Combine the random elements of the Python Variables.
In this part, I'm going to combine all the randomly chosen elements.
So, there are four elements from four variables.
Let's Combine the four of them to make the 4 characters of the password.
For example,
# combine the character randomly selected above
# at this stage, the password contains only 4 characters
temp_pass = rand_digit + rand_upper + rand_lower + rand_symbol
Thus, you can see that 4 characters stored in temp_pass variable.
Fill the rest of the password Characters using Python for loop
Now, we've taken each character from each variable.
So, next, we can fill the rest of the characters using for loop.
Here's how:
# now that we are sure we have at least one character from each
# set of characters, we fill the rest of
# the password length by selecting randomly from the combined
# list of character above.
for x in range(MAX_LEN - 4):
    temp_pass = temp_pass + random.choice(COMBINED_LIST)

    # convert temporary password into array and shuffle to
    # prevent it from having a consistent pattern
    # where the beginning of the password is predictable
    # Here we're converting value into array to restrict data
    temp_pass_list = array.array('u', temp_pass)
    random.shuffle(temp_pass_list)
In the above code, I've chosen the remaining characters using for loop.
Here, I want to point out two lines inside for loop.
First one, temp_pass_list = array.array('u', temp_pass) and Second one random.shuffle(temp_pass_list).
Let's go to the first one, temp_pass_list = array.array('u', temp_pass). It's showing the array created in Unicode format. because Unicode assigns each symbol or character to a piece of code. That makes our password too strong.
Next line is random.shuffle(temp_pass_list). The purpose of this line is to not follow the pattern in the password. Because if password follow some pattern. It's easy to guess.
So, We've used this line to break the password pattern.
Combine all the 4 and randomly choose characters to Create a Strong Password
In this phase, I'm going to Create the Complete password through iteration.
You can combine all the password characters using for loop.
Here's how:
# Create Empty password variable
password = ""
# Combine all password characters through for loop
for x in temp_pass_list:
        password = password + x
Let's display the password using Python:)
import random
import array

# maximum length of password needed
# this can be changed to suit your password length
MAX_LEN = int(input('Enter the number of digits: '))


DIGITS = ['0', '1', '2', '3', '4', '5', '6', '7', '8', '9']
LOCASE_CHARACTERS = ['a', 'b', 'c', 'd', 'e', 'f', 'g', 'h',
                    'i', 'j', 'k', 'l', 'm', 'n', 'o', 'p', 'q',
                    'r', 's', 't', 'u', 'v', 'w', 'x', 'y',
                    'z']

UPCASE_CHARACTERS = ['A', 'B', 'C', 'D', 'E', 'F', 'G', 'H',
                    'I', 'J', 'K','L', 'M', 'N', 'O', 'p', 'Q',
                    'R', 'S', 'T', 'U', 'V', 'W', 'X', 'Y',
                    'Z']

SYMBOLS = ['@', '#', '$', '%', '=', ':', '?', '.', '/', '|', '~', '>',
        '*', '(', ')', '<']

# combines all the character arrays above to form one array
COMBINED_LIST = DIGITS + UPCASE_CHARACTERS +LOCASE_CHARACTERS + SYMBOLS

# randomly select at least one character from each character set above
rand_digit = random.choice(DIGITS)
rand_upper = random.choice(UPCASE_CHARACTERS)
rand_lower = random.choice(LOCASE_CHARACTERS)
rand_symbol = random.choice(SYMBOLS)

# combine the character randomly selected above
# at this stage, the password contains only 4 characters
temp_pass = rand_digit + rand_upper + rand_lower + rand_symbol

# now that we are sure we have at least one character from each
# set of characters, we fill the rest of
# the password length by selecting randomly from the combined
# list of character above.
for x in range(MAX_LEN - 4):
    temp_pass = temp_pass + random.choice(COMBINED_LIST)

    # convert temporary password into array and shuffle to
    # prevent it from having a consistent pattern
    # where the beginning of the password is predictable
    # Here we're converting value into array to restrict data
    temp_pass_list = array.array('u', temp_pass)
    random.shuffle(temp_pass_list)

# Create Empty password variable

password = ""

# Combine all password characters through for loop
for x in temp_pass_list:
        password = password + x

# print out password
print(password)
So, Let's run our program.
Enter the number of digits:
When you type the 8 digits. It'll generate the 7 digits password.
Here's how:
Your Random generated password
Enter the number of digits:8
i45O@K?i
At last, we've generated the random password.
Let's go to Second Part of the blog where I'll send the generated password to the user.
Send the generated password to the user in Python
This is the second file where I'll write code to send the message to the User.
To send the message I’m making a new file.
Let’s Understand what I’m going to do here!
First, I'll make an account in FAST2SMS. You can Sign Up here. FAST2SMS is an API that sends the message to the user when we submit data to it. Because we can't directly message the user.
Import the Python modules
To use this method you need to make a request to the Fast2sms.
That’s why I’m going to import the requests library
Here's how:
import requests
Meanwhile, we need to collect the data from FAST2SMS.
This data is the message we want to send to the user.
Hence, you need to use the JSON module.
Here's how:
import json
As you know, we've to send the generated password to the user. So, we need to import the first file that is password generated file into the current file.
For example,
import passwords
# Import the password Variable
from passwords import password
Make a URL that we want to make a request
Next, We'll make a URL that we want to make a request to the FAST2SMS's API. Here's how:
# we've to make api request to the below Url
url = "https://www.fast2sms.com/dev/bulk"
Make a User's data in python dictionary format
In this phase, I'm going to Create two dictionaries.
The First dictionary holds all the data related to the Sender and User.
Here you've to define sender id, phone number, language, route and the message to the user.
Let's see the dictionary:
# Create a dictionary for message data
# here we've provided our and Customer data
my_data = {
         # This is your sender id
        'sender_id': 'FSTSMS',
         # Put your message
         'message':f'Your random password for heypython generated!.It is {password}'.,

         'language':'english',
         'route': 'p',
         # Send the message to the number

         'numbers':'88888888'
         }
In the above example, you can see that I've used fstring in message key. Basically, this formats the statement and random password.
Meanwhile, We can create a second data of the dictionary. This dictionary shows the API key, Content-Type and cache control. This API Key makes the secure authentication to the fast2sms. That we’re verified, the user.
Here's what our second dictionary looks like:
# header is making secure authentication to Fast2sms account
headers = {
    'authorization':'08TmvcTlFbUWhT1w3q9RgegfWOZ5YDhe5l0pwmkGvYnunddWrvvLcwF5lPLW',
    'Content-Type':'application/x-www-form-urlencoded',
    'Cache-Control': "no-cache"

    }
Make a request and load the data in Python dictionary format
We've made the URL, Created the dictionaries data.
Next, we've to submit this data to the FAST2SMS to send the message to the User.
For this purpose, I'm going to use a POST request.
The POST request submit the data to FAST2SMS. Here's the line you've to write:
# make a post request to send a data to fast2sms. It store in request body
response = requests.request("POST",url,data = my_data,headers = headers)
Next, I'm going to load the data using JSON.
Here's how you can do this:
#load json data from source in dictionary format
returned_msg = json.loads(response.text)
Use Python dictionary key to send message
After, you've loaded the data. You've to show the message to the User. Not their phone number.
As a result, you can use the message key.
See below to check how I've done this:
# print the send message--> message is key
# We want Customer to see the message
print(returned_msg['message'])
Remember, you can only access the message key. If you try to access other keys, the python interpreter gives you the key error.
Let's see the program for sending the message:)
import passwords
from passwords import password
# import library to make the request to the web page
import requests
# Make a secure authentication b/w Client and Server using json
import json

# we've to make api request to the below Url
url = "https://www.fast2sms.com/dev/bulk"

# Create a dictionary for message data
# here we've provided our and Customer data
my_data = {
         # This is your sender id
        'sender_id': 'FSTSMS',
         # Put your message
         'message':f'Your random password for heypython generated!.It is {password}',

         'language':'english',
         'route': 'p',
         # Send the message to the number

         'numbers':'88888888'

        }
# first we'll make request to the Fast2SMS, then it'll authorize us using API key then decide whether to make request to the
# header is making secure authentication to Fast2sms account
headers = {
    'authorization':'08TmvcTlFbUWhT1w3q9RgegfWOZ5YDhe5l0pwmkGvYnunddWrvvLcwF5lPLW',
    'Content-Type':'application/x-www-form-urlencoded',
    'Cache-Control': "no-cache"

    }

# make a post request to send a data to fast2sms. It store in request body
response = requests.request("POST",url,data = my_data,headers = headers)
#load json data from source in dictionary format
returned_msg = json.loads(response.text)

# print the send message--> message is key
# We want Customer to see the message
print(returned_msg['message'])

# Here fast2sms only send message value!
# If you try to access the number and other data it'll give key-error
Note: Above In numbers key, you've to put your or User's number.
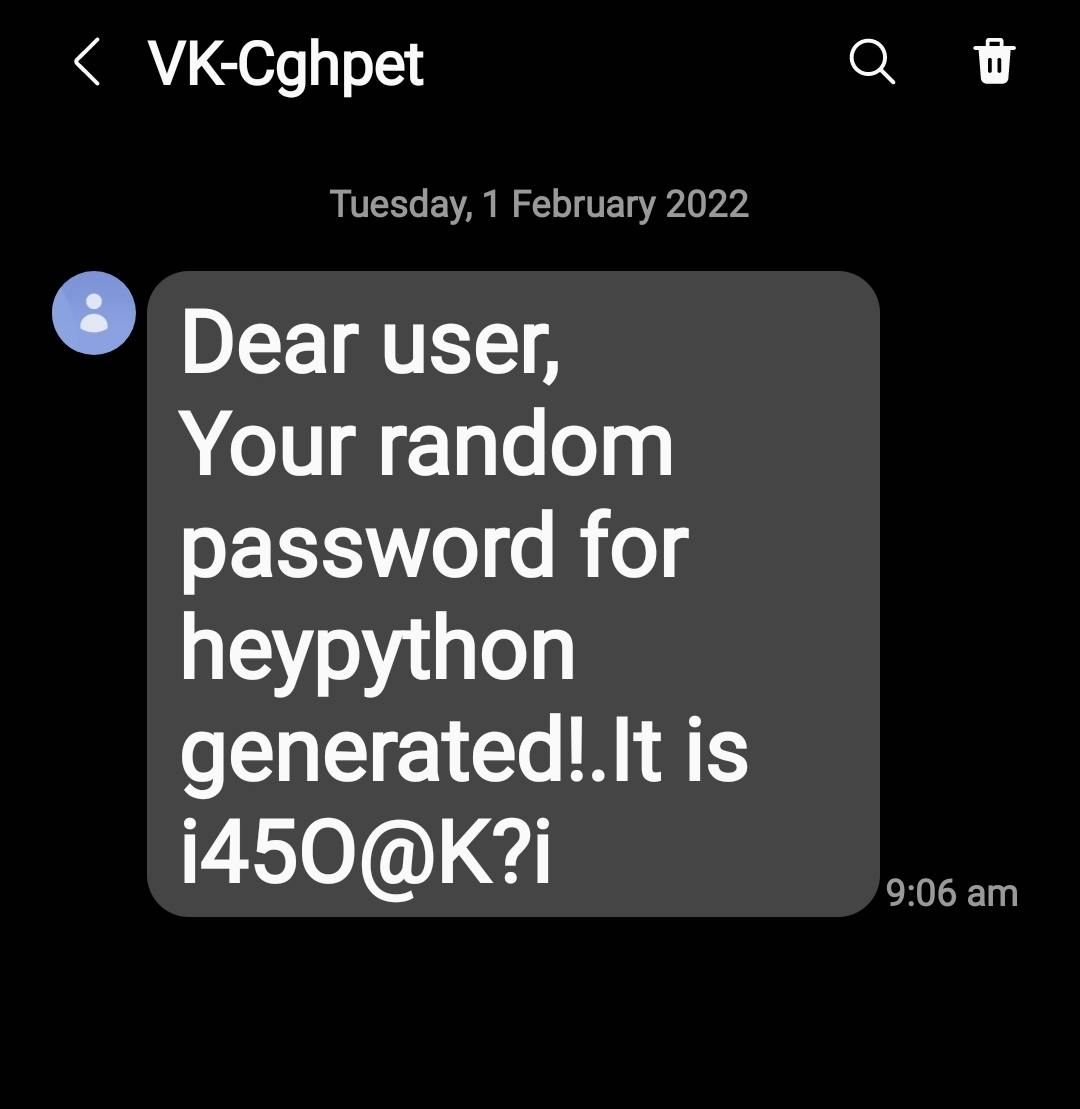
When you run above code:
Enter the number of digits: 8
i45O@K?i
['SMS sent successfully.']
If everything is right then you'll see the 'SMS sent successfully message.'
Otherwise, you'll see the message of the wrong API key.
Here's the screenshot of how your output will look:
So, you’ve seen **how to generate the random password and send the message of that password to the user.
Conclusion
Finally, you’ve seen the Complete guide to this project. Let’s do a recap!
Here, we’ve generated the random password and sent the generated password message. For generating random passwords We’ve Created the passwords.py file.
This file contains a random and array module. A random module randomly chooses the number from the list. , the array module makes constrain data type.
Meanwhile, we need to send the message to the User. Fast2sms’s API is great for this. The thing you’ve to do is to import the requests and JSON library. A requests library will make a request to the Fast2sms. After that, JSON loads the data from the Fast2sms.
As you know we’ve to run both files at a time. So, you can import the first file(passwords.py) into the second file(Send.py).
When you’ll run the program It takes a some digits from the user and generates the password. This password is going to send to the user’s number.
If you loved this blog post, tweet it on Twitter. And also, follow me back on Twitter. So, you never miss the cool Python Projects.
Great Resources
1> mulesoft.com/resources/api/what-is-an-api
2> geeksforgeeks.org/generating-strong-passwor..
3> geeksforgeeks.org/send-text-messages-to-any..
4> fast2sms.com
The last thing if you want awesome Python topics cheat-sheet. Check me on Gumroad. I'm waiting for you.