
How you can feel current weather(sun, rain and cold) of your city below the feet using tiny python?


Introduction

Do you feel the current weather in your city?
I'm sure you are!
Likewise, I'm feeling cold.
But you ever asked, " how can we find current weather(sun, rain and cold) of the city using Python? "
Ah, Rarely!
In this blog post, you're going to feel the current weather(sun, rain and cold) of the city using Python.
Check out youtube channel:
I know, you're getting curious!
Libraries for this project

To do this, you need two python libraries(requests and pprint) and cool methods.
The first is the requests library.
This library make HTTP requests in a python.
It reduces the complexities of making requests behind a beautiful, simple API(Communicate two application). So, you can easily
interact with services and consume the application data.
You can get more about requests library in this post.

The next library that I'm going to use is pprint.
A pprint library makes the JSON format simpler and understandable.
It prints complex objects such as a dictionary.
To know more about pprint, check out here.
Do you know any other object that pprint() can display but not the print() method? COMMENT BELOW!
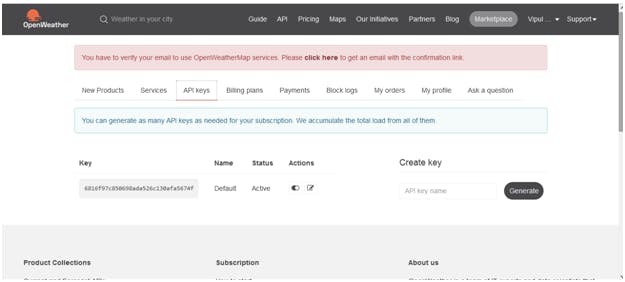
Login to openweathermap.org
First of all, you need to login openweathermap.org.
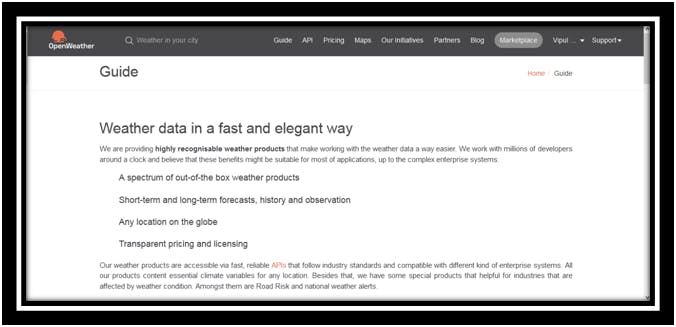
After login, you've to go to the API keys(secure authentication) section. Here, you'll see your API keys.
What's the Use of the API key?

You can use API keys to securely authenticate by openweathermap.org.
These API keys we'll use further in our program.
Let's start our program!
Python code for weathercast-project
First, I'm going to import the requests library.
import requests
This library will make HTTP requests.
Second, we'll import the pprint library.
This library makes JSON data into dictionary format.
from pprint import pprint
Hence, you can easily see the data.
Third, I'm going to define the variable API_KEY. This variable is going to define the API_KEY.
API_KEY = "6816f97c850698ada526c130afa5674f"
Here, you've to enter the API_KEY that is present in your account. You can see it in the below image

So, you've done the three steps.
Next, you've to take the user input.
This user input will be the city name, you want to get the weather.
city = input('Enter a city name: ')
After that, I'll create a URL that we want to make a request. So, I'm going to use the below line of code.
base_url ="https://api.openweathermap.org/data/2.5/weather?appid="+API_KEY+"&q="+city
Overhead, you can see that string URL, API_KEY and city name contain the base_url. What's the above URL showing?
The above URL shows the string URL. Oh! you're thinking about where the first portion came from?
So, you can see the below image.
In the black header, After the Guide, you'll see the API Option.
Click on API. you'll see something like below
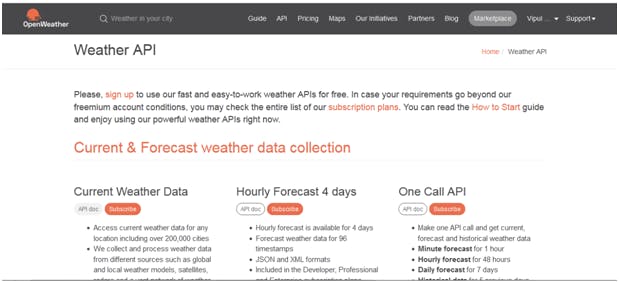
Here, you're seeing the API doc option. Click on it!
After clicking, you'll see different API Call.
Something like below,
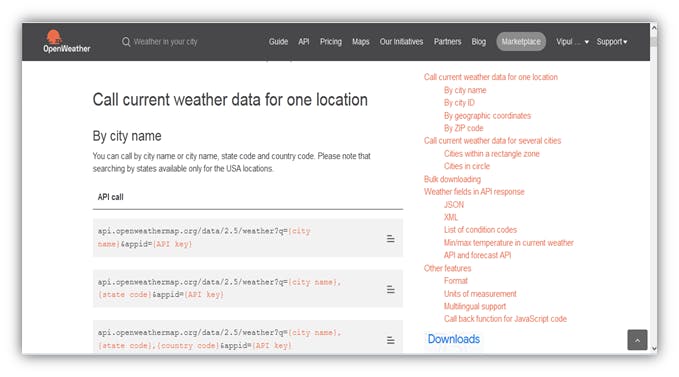
So, you're seeing some API Call.
When you go from your account(Openweathermap.org), there are many API calls(Submit the request to API).
In this, you can call API by city, state and country code. Here, I've made API call using city name.
After creating a base_url, you can make request to that URL. I'm going to use the get() method.
The get method looks as:
r = requests.get(base_url).json()
Above line of code going to make a request to the base_url.
Next, you've to display this JSON data in the simple form.
pprint(r)
When I'll combine all the code, it becomes
# Make a HTTP request
import requests

# Make a JSON Format data simple using pprint
from pprint import pprint

# Generate a API KEYS that make request to the openweathermap.org
API_KEY = "6816f97c850698ada526c130afa5674f"

# Take a user Input
city = input('Enter a city name: ')

# Create a base_url that I want to make a request
base_url ="https://api.openweathermap.org/data/2.5/weather?appid="+API_KEY+"&q="+city

# Make a request to the base_url using JSON
r = requests.get(base_url).json()

# Display the JSON DATA in easy format
pprint(r)
When I run above program, It ask for input something like below:
Enter a city name:
Hey, I'm going to put the london as user input.
Enter a city name: london
So, I've put the user input.
When python interpreter process program, it gives output as:
Enter a city name: london
{'base': 'stations',
 'clouds': {'all': 75},
 'cod': 200,
 'coord': {'lat': 51.5085, 'lon': -0.1257},
 'dt': 1641096147,
 'id': 2643743,
 'main': {'feels_like': 285.17,
          'humidity': 94,
          'pressure': 1010,
          'temp': 285.43,
          'temp_max': 286.24,
          'temp_min': 284.65},
 'name': 'London',
 'sys': {'country': 'GB',
         'id': 2019646,
         'sunrise': 1641110761,
         'sunset': 1641139355,
         'type': 2},
 'timezone': 0,
 'visibility': 10000,
 'weather': [{'description': 'broken clouds',
              'icon': '04n',
              'id': 803,
              'main': 'Clouds'}],
 'wind': {'deg': 210, 'speed': 4.12}}
Overhead, you can see the data in dictionary format.
Here, you can find the temperature of the city. To do this you've to add the below line of code in program:-
c = r["main"]["temp"]
print("The temperature of the",city," is",c,"K!")
Here, I've used the first "main" key. After that, I've used the "temp" key. You can't directly access the "temp" key because it's a value of the "main" key.
When I run the above code, you'll get the temperature in kelvin.
The temperature of the london is 285.43K!
Because the temperature unit is in Kelvin.
So, I'm going to do celsius = Kelvin - 273.15
Here, Kelvin = r["main"]["temp"] = 285.43K To convert code into celsius, add the below line of code in program
print("The temperature of the",city," is",round(c-273.15),"celsius!")
When Interpreter run this code, you'll get:
The temperature of the london is 12 degree celsius!
When I combine all the code:
# Make a HTTP request
import requests

# Make a JSON Format data simple using pprint
from pprint import pprint

# Generate a API KEYS that make request to the openweathermap.org
API_KEY = "6816f97c850698ada526c130afa5674f"

# Take a user Input
city = input('Enter a city name: ')

# Create a base_url that I want to make a request
base_url ="https://api.openweathermap.org/data/2.5/weather?appid="+API_KEY+"&q="+city

# Make a request to the base_url using JSON
r = requests.get(base_url).json()

# Display the JSON DATA in easy format
pprint(r)

c = r["main"]["temp"]
print("The temperature of the",city," is",c,"K!")

print("The temperature of the",city," is",round(c-273.15),"degree celsius!")
So, you've seen the temperature of the city using python.
Likewise, you can see the clouds and rain in the city.
If you want to understand whole project, then you need to do this project. And comment below what EXTRA feature you want to add!
Conclusion
Finally, you've seen the temperature of the city using python.
In this post, I've shown you two libraries.
The first library is requests request to the HTTP Page.
Likewise, the second library is pprint. This library makes JSON format data into dictionary format. To access the value in the dictionary, I've used key here.
Here, you can see that I've used the API keys.
The API keys make secure authentication to the URL that we want to request.
Next, we'd take the input from a user.
This input is the city name.
At last, I've created the base_url that contains the Website Url, API Key and User Input.
Importantly, we've made the request to the URL using get() method.
After making the request, you've to display the JSON Data into the simple form using pprint().
What thing do you want to add to this project?
If you liked my blog post, subscribe to my newsletter:)
You can also check out the GitHub code below
github.com/vipulkunwar000/Weather-forecast/..